Saturday, 10 December 2011

HP TouchPad Review

I know that it is very, very late. But still I somehow got my hands on a HP TouchPad last week. It is here with me for few weeks. So, here's the review

The Lockscreen
This is what the lockscreen looks like.


To unlock the screen, you've to simply slide the lock icon to any part of the screen and it gets unlocked. Moreover, you can also set up a PIN or a password to securely lock your TouchPad.

Now, this is how the desktop looks like with a few cards (apps on TouchPad) open.


The icons on the bottom are, web browser, mail, music player, photos, Facebook & all apps. They can all be changed according to your needs. To change them, you simply have to drag them out of their place & replace them with the icons of your choice.

The UI


This is the UI. It is divided into Apps, Downloads, Favorites & Settings. 
Apps Tab

Downloads Tab
Favorites Tab
Settings Tab

The Web-Browser

The Web-Browser is Webkit based. It has full support for Adobe Flash. The embedded YouTube videos play right inside the browser. Here are some screenshots of the browser


Interestingly, it doesn't clears the Acid 3 tests. And below is the screenshot depicting YouTube video playing right inside the browser.

The E-Mail client, Contacts & Calendar

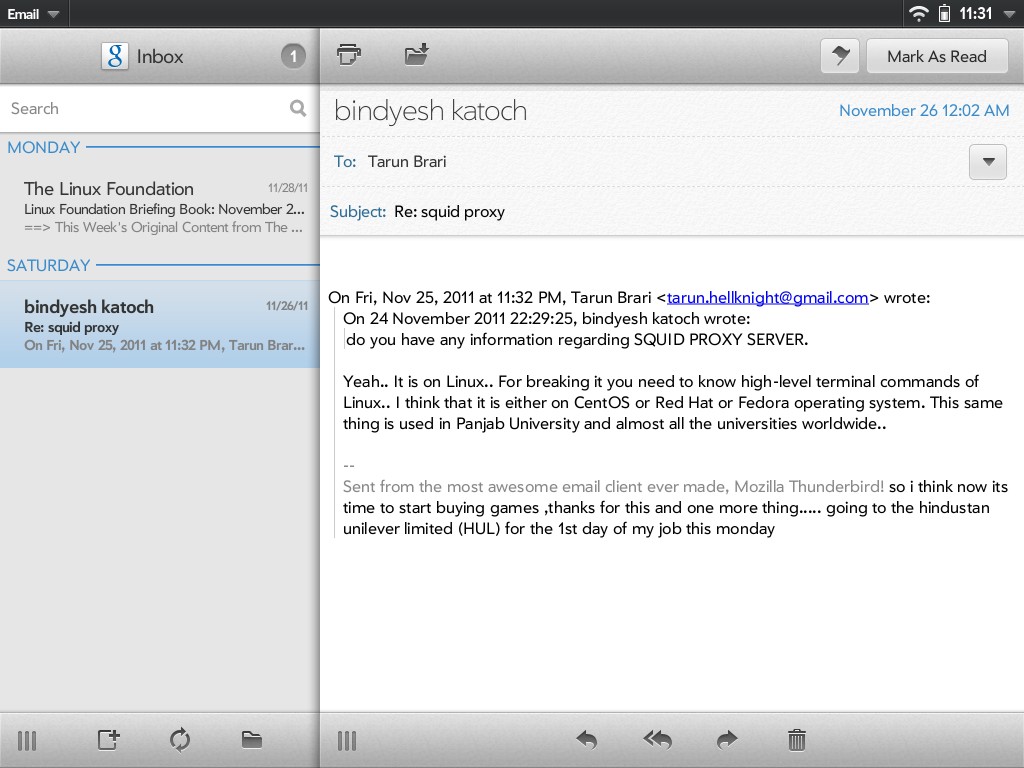
The E-Mail client integrates it self with the accounts that you've entered in the TouchPad. There is support for GMail, Hotmail, AOL, Yahoo!, MS Exchange & even Facebook. Here's the email account in action.


You can see that there is full support for HTML mail inside the browser. Attachments like images are displayed inline. For Office documents there is QuickOffice to handle them. It supports MS Office & ODF files.

Maps & Gallery


Maps is taken care by Bing Maps. Here's the screenshots of maps


Gallery


The gallery integrates itself with the Facebook account that you've entered. Also, the images which you download from the internet are automatically displayed inside the gallery. Here's the screenshot of the gallery in action.


Verdict :-


Pros :- 

  • Awesome hardware.
  • Plays games without lag.
  • Support for XviD, DivX, MP4, Ogg Vorbis, FLAC, MP3, AAC formats.
  • Superb Multitasking.
  • Good OS.
  • Superb sound from the device.
Cons :-
  • Very, very few apps.
  • Screen is very reflective.
  • Lack of EPUB reader.
  • No SD-Card slot.


Enhanced by Zemanta

Friday, 25 November 2011

The Nook Tablet Review

It's raining cheap tablets. Amazon Kindle Fire is one of the new entrants in the arena. But it all started with Barnes & Noble Nook Color tablet. That tablet, was released last year & made headlines across the cyberspace. Once rooted, it turned into a full fledged tablet. Now, Barnes & Noble have announced a successor to the tablet. It is called The Nook Tablet. It isn't available in India right now (Barnes & Noble are you listening). But the folks over Ars Technica & Engadget have an excellent review of the tablet. You should check it out.
Enhanced by Zemanta

Wednesday, 23 November 2011

Doom 3 is now under GPL 3

The box art for Doom 3

Doom 3, one of the greatest and critically acclaimed games of all time is now open sourced. That's right, you heard it right.. Doom 3 is under GPL 3 license. John Carmack has a history of releasing his games under the GPL license & he kept his promise. Doom 3 is built around OpenGL, it was compatible with Windows, Linux & Mac. It was delayed for 18 months because the hardware which was required to run the game wasn't available at that time. So, download the source code, compile it & enjoy Doom 3. BTW, be prepared to see loads of first person shooters with Doom 3 engine in the coming months.
Enhanced by Zemanta

Fedora 16 released

The Fedora Project logo

I may be late to tell you guys this. But one of the most awesome GNU/Linux distributions, Fedora 16 was released this month. It comes with GNOME 3.2 & KDE 4.7. Along with that it comes with awesome printing support & loads of language support. One of the best yet un-noticed feature of Fedora is Delta RPM. When coupled with yum-presto, Delta RPMs reduce the size of the updated packages upto 90% in some cases. This is a big, big boon to people who are on limited bandwidth or on slow network. You might wanna give Fedora 16 a try.
Enhanced by Zemanta

Tuesday, 22 November 2011

Kindle Fire, 2nd most desired tablet

Apple iPad is the largest selling tablet of all time. HP TouchPad is the second largest selling tablet due to the recent sale. It has a very, very capable operating system (WebOS). I don't know why HP backed off. But the 2nd most desireable tablet is Amazon Kindle Fire. That cute, 7-inch tablet is getting rave reviews from media. It only lacks a SD card slot as it's internal memory is low (8 GB). Check out some more details about the tablet.
Enhanced by Zemanta

Chatting from Command Line

Tux, the Linux penguin
Image via Wikipedia
We Linux users really, really love to accomplish things from the terminal. Although, Terminal is not required in today's era, but still, Terminal rules. Off lately, I was looking for something to chat via the command line. I got success in the IRC department via Weechat. It is a fabulous application that has loads of features. But what about Instant Messaging? MakeUseOf has an excellent article related to command line chat. Check it out..

Enhanced by Zemanta

AMD Bulldozer's failure

I have been a huge AMD fan since the days of AMD Athlon 64
Image representing AMD as depicted in CrunchBase
Image via CrunchBase
. Back in those days it demolished Intel's processors. But since the acquisition of ATI, the company has been steadily going downhill. The last breath of fresh air as AMD Phenom II series, which gave some competition to Intel. But since the introduction of Intel's Sandy Bridge series, AMD has failed to catch on. And now, after the introduction of Sandy Bridge-E, AMD is completely out of the game.

Granted, that AMD has better price-to-performance ration, but seriously, that isn't going to help them. They have a brilliant graphics chipset but their processor performance is hampering them. AMD is good when it comes to HTPC & budget rigs but fails to deliver in the hardcore & enthusiast section. I wish that under the new CEO, they take some important steps in delivering performance chips.

Related articles
Enhanced by Zemanta

Thursday, 29 September 2011

CentOS 6.0 Review

CentOS
Image via Wikipedia
As you all know, I had installed CentOS 6 inside VirtualBox. I was initially thinking about installing it natively on my system, but then, the thought of reinstalling the OS & configuring the settings again came to my mind and I decided to go virtual. So, here's the hardware on which I installed CentOS 6 (32-bit) :-
  • 2 virtual cores
  • 1024 MB RAM
  • 64 MB of VRAM
  • 10 GB VBOX HDD
  • Bridged network connection (so that I can manage it as a network computer)
Installation :-

I made an ISO of the DVD which I got from Linux for You. Although I had also downloaded a 64-bit image earlier, but I felt that 32-bit should suffice for the needs of the virtual machine. The installer greets you with the ultra-stable and famous Anaconda Installer from Red Hat & Fedora stables. This installer, as you know is very versatile. It asks you to check the install media. It is a good idea to do so. Once, the check is finished, it moves on to the patition management. Now, here it will provide you with a lot of options like RAID, LVM etc. If you want to setup a LVM (which I think you should if you're doing a native one-OS-per-system install), then it will guide you through the entire process. RAID is essential for the system admins & servers. But, if you don't want any of these options, then select 'Basic Storage Devices'  and move on. Now, here you can carry out standard Linux partition management.

Once, you've finished the partition & root-password, then it will ask you which packages to install. If you've a fast internet connection then you can download & install the packages later, if you haven't got your hands on high bandwidth then click on 'Customize now'  and start selecting your packages. These are the packages that I selected :-
  • GNOME 2.32
  • OpenOffice.Org (it doesn't ships LIbreOffice for now)
  • Firefox
  • Thunderbird
  • Development libraries
  • Development tools
It will automatically choose which packages you need for your hardware. Just hit install now & relax. It should install in 20-30 minutes.


The Desktop :-

The desktop of CentOS 6 depends on which desktop environment you selected. I'm a huge fan of GNOME desktop environment so I selected this. Here's the screenshot of my desktop environment :-


Package management :-

The package management is taken care by YUM. It is the default package manager of Red Hat, Fedora, CentOS & Scientific Linux now. Yum is very, very powerful tool. It can perform almost any task that you can think from a package manager. Some of it's commands are listed below :-
  • yum install package (to install package)
  • yum remove package (to remove package)
  • yum search package (to search)
  • yum update
  • package-cleanup --old-kernels (to remove old kernels)
Tip :-

Run yum install yum-presto after running your system for the first time in the terminal. It will install DeltaRPMs & Presto package that will reduce the update size by almost 90%. It is a very useful and handy tool for everybody. Conserve bandwidth people.

Additional repos for yum - You can try out some extra repositories for CentOS from here :- http://wiki.centos.org/AdditionalResources/Repositories/RPMForge

Verdict :-

CentOS 6.0 is highly recommended to anybody who is serious about the stability & security of his workstation. Although it is also good for home users, but I think that one should first have some experience with LInux before using CentOS. My rating :- 4.5/5.
Enhanced by Zemanta

One file to rule them all.

Last week I gave a try to CentOS 6.0. I installed it inside VirtualBox in Windows 7. I was simply amazed by its stability and very low memory usage. I think that ultra-stable & tested packages use much, much less memory as compared to the bleeding edge packages. So, the next task was to share the folders between CentOS & Windows. I knew I had to install SAMBA package for this. I installed the SAMBA packages but turns out, setting up SAMBA on CentOS is quite tough. The first and foremost headache about CentOS is the dreaded SELinux. This may be very, very useful to the enterprises etc. But I don't see a single reason why it should be kept on it's default (on) settings for the home user. Whenever I tried to do something regarding networking & other stuff, the dreaded SELinux would take over and wouldn't let me do so. So, I had to disable it.

#
# /etc/rc.conf - Main Configuration for Arch Linux
#

# -----------------------------------------------------------------------
# LOCALIZATION
# -----------------------------------------------------------------------
#
# LOCALE: available languages can be listed with the 'locale -a' command
# DAEMON_LOCALE: If set to 'yes', use $LOCALE as the locale during daemon
# startup and during the boot process. If set to 'no', the C locale is used.
# HARDWARECLOCK: set to "UTC" or "localtime", any other value will result
#   in the hardware clock being left untouched (useful for virtualization)
#   Note: Using "localtime" is discouraged.
# TIMEZONE: timezones are found in /usr/share/zoneinfo
# KEYMAP: keymaps are found in /usr/share/kbd/keymaps
# CONSOLEFONT: found in /usr/share/kbd/consolefonts (only needed for non-US)
# CONSOLEMAP: found in /usr/share/kbd/consoletrans
# USECOLOR: use ANSI color sequences in startup messages
# VERBOSE: Verbose level (from 1 to 8). man 3 syslog for level info
#
LOCALE="en_US.UTF-8"
DAEMON_LOCALE="no"
HARDWARECLOCK="localtime"
TIMEZONE="Asia/Kolkata"
KEYMAP="us"
CONSOLEFONT=
CONSOLEMAP=
USECOLOR="yes"
VERBOSE="3"

# -----------------------------------------------------------------------
# HARDWARE
# -----------------------------------------------------------------------
#
# MODULES: Modules to load at boot-up. Blacklisting is no longer supported.
#   Replace every !module by an entry as on the following line in a file in
#   /etc/modprobe.d:
#     blacklist module
#   See "man modprobe.conf" for details.
#

#MODULES=(vboxdrv vboxnetflt)
MODULES=(powernow-k8 cpufreq_ondemand cpufreq_powersave vboxdrv vboxnetflt )
# Udev settle timeout (default to 30)
UDEV_TIMEOUT=30

# Scan for FakeRAID (dmraid) Volumes at startup
USEDMRAID="no"

# Scan for BTRFS volumes at startup
USEBTRFS="no"

# Scan for LVM volume groups at startup, required if you use LVM
USELVM="no"

# -----------------------------------------------------------------------
# NETWORKING
# -----------------------------------------------------------------------
#
# HOSTNAME: Hostname of machine. Should also be put in /etc/hosts
#
HOSTNAME="AX-64"

# Use 'ip addr' or 'ls /sys/class/net/' to see all available interfaces.
#
# Wired network setup
#   - interface: name of device (required)
#   - address: IP address (leave blank for DHCP)
#   - netmask: subnet mask (ignored for DHCP)
#   - gateway: default route (ignored for DHCP)
#
# Static IP example
# interface=eth0
# address=192.168.0.2
# netmask=255.255.255.0
# gateway=192.168.0.1
#
# DHCP example
# interface=eth0
# address=
# netmask=
# gateway=

interface=eth0
address=192.168.1.2
netmask=255.255.255.0
gateway=192.168.1.1

# Setting this to "yes" will skip network shutdown.
# This is required if your root device is on NFS.
NETWORK_PERSIST="no"

# Enable these netcfg profiles at boot-up. These are useful if you happen to
# need more advanced network features than the simple network service
# supports, such as multiple network configurations (ie, laptop users)
#   - set to 'menu' to present a menu during boot-up (dialog package required)
#   - prefix an entry with a ! to disable it
#
# Network profiles are found in /etc/network.d
#
# This requires the netcfg package
#
#NETWORKS=(main)

# -----------------------------------------------------------------------
# DAEMONS
# -----------------------------------------------------------------------
#
# Daemons to start at boot-up (in this order)
#   - prefix a daemon with a ! to disable it
#   - prefix a daemon with a @ to start it up in the background
#
# If something other takes care of your hardware clock (ntpd, dual-boot...)
# you should disable 'hwclock' here.
#
DAEMONS=(hwclock @acpid syslog-ng network netfs dkms_autoinstaller sshd @crond @alsa dbus hal gdm @cups @cpufreq @cpu)


Secondly, I've been using Arch Linux for a while now. I like it so much that it is my default operating system now. Windows 7 is for games & FreeBSD is for learning BSD. The cool thing about Arch Linux (besides the KISS principle) is /etc/rc.conf file. This is THE file which you can use to manage your system. Here's the output of my rc.conf file.

As you guys can see, I can manage what ever I want to manage of my system. Be it networking, hostname, kernel modules, daemons etc. Whereas in System V based I had to edit various files regarding what I was configuring. This is where CentOS gets frustrating. That's why rc.conf is often regarding as One file to rule them all.


Friday, 21 January 2011

Building a HTPC under Rs. 50000

Its winter everywhere (except in southern hemisphere). Most of the people are currently curled up in their beds watching movies & TV shows. There's tonne of legal and illegal content out on the web right now. But, I'm not going to get into legal battle right now. That's for you guys to decide. Instead, I'm writing a small guide to help you guys with all your HTPC needs. So, here we go.

Microprocessor :-

This is one of the most important things for a HTPC. Now there are two things that we need to look upon :-

  • Processor with great processing power.
  • Less TDP & heat footprint.

The first thing that came into my mind when I was going to build a HTPC computer was AMD Athlon II X2 250 processor. Its a great processor, 65 W TDP, built on 45 nm architecture & couple it with a motherboard that has ATI 4200 onboard graphics and you've got a killer HTPC. This will also bring the cost down. But, this will work only great in Windows where one can utilize the ability of ATI 4200 to decode HD graphics. Take Linux into consideration and all hell breaks loose. I am a great supporter of FOSS idealogy. So, I had to choose the components which worked flawlessly under Linux. ATI has huge headaches with Linux. Only Ubuntu has good support for these. Other distros such as Arch Linux, Fedora etc are not supported by the ATI's drivers.

This is where Intel comes to our rescue. The new IntelH55 chipset runs flawlessly under Linux. XBMC also supports it, which I intend to use. Its very unfortunate that NVIDIA is leaving the chipset business other wise I would've gladly included a NVIDIA motherboard in the configuration. The processor that I chose is Intel Core i3 530. It is an awesome processor. I'm not going to review it right now but you can check out this excellent review by AnandTech. This processor costs Rs. 5500

Motherboard :-

For motherboard, I went with the MicroATX form factor. The motherboard that I stumbled upon after 30 minutes of research is Biostar H55-HD. This motherboard has a built in HDMI, DVI & VGA port. So you can use which ever you want. Moreover, It also has overclocking ability so you can overclock your awesome Intel Core i3 530 processor to all the way to 4 GHz (with a good PSU offcourse). Here's the link. The cost of the motherboard is around Rs. 3400

Memory :-

The prices of RAM are dirt cheap now. DDR3 is going around Rs. 2700 for 4 GB. I chose Corsair as it has 10 years warranty and can also be overclocked if the need arises. The price of this 4 GB kit is Rs. 2800.

Hard Disk Drive & Optical drive.:-

Hard drive is a very essential part of a computer. It becomes more important when you consider HTPC. I chose Western Digital Caviar Green 1 TB HDD. It has 64 MB of cache, uses only 6 W of power when running & comes with a 3 year warranty. Here's the link. The price is Rs. 2900.

For your optical drive needs, stick to a standard SATA drive from Sony or Samsung. Blu-Ray movies are currently expensive in India now. A Hollywood movie is around Rs. 1700 whereas a Hindi movie is around Rs. 700. Price for DVD drive :- Rs. 1100.

Input Devices :-

As we are building a HTPC, it is ultra-important that we stick to a wireless combination of keyboard and mouse. The Logitech CL MK320 do the job well & are also priced superbly. You can get this combo kit for Rs. 1500. Also, they have a 3 year warranty.

Monitor :-

Obviously, as we are building a HTPC, we need a monitor that supports full HD resolution. The inclusion of all 3 standards of input will be an added bonus. So, I went for BenQ G2420 HD. This is a superb monitor. Its 24" diagonally, 1920x1080 resolution, 1000:1 contrast ratio and has HDMI, DVI & VGA inputs. Moreover it is superbly priced at Rs. 11600.

Cabinet :-

This is also one of the most important parts of HTPC. If you guys are going to stick to dedicated graphics card, then I suggest you go for a mid-tower cabinet. But, I went ahead and selected the awesome Cooler Master Elite 100. This cabinet supports both MicroATX & mini-ITX form factor motherboards. It has a bundeled 150 watt SMPS which should be more than enough for our configuration. Check it out.

Speakers :-

For an HTPC, we definitely need 5.1 surround sound speakers. There are large variety of speakers available in the market this time. Some are very highly priced. So I striked the balance between cost and performance and went for Logitech Z-506 speakers. They are "bloody awesome". They have a power output of 75 W RMS which is more than sufficient for a living room. They support multiple inputs be it PC, Xbox 360, PS3 or DVD player and even audio input from your AV cable. Go for these ones. They are around Rs. 6500.

So this is our final configuration :-

  1. Intel Core i3 530
  2. Biostar H55-HD
  3. Corsair 4 GB DDR3
  4. WD Caviar Green 1 TB HDD
  5. Sony SATA DVD RW
  6. Logitech CL MK320 combo kit
  7. BenQ G2420 HD monitor.
  8. Cooler Master Elite 100 cabinet.
  9. Logitech Z-506 5.1 speakers.

The total cost of this setup is Rs. 38,300.

Software :-

I suppose you guys already have Windows 7 Home Premium license. If not either get one or like me, install Linux on it. You can install any GNU/Linux distro. Some of my recommendations are :-

  1. Ubuntu 10.10.
  2. Fedora 14.
  3. Linux Mint.
  4. Opensuse 11.3.

They all support the hardware out of the box. Choose 32-bit if your RAM is less than 4 GB else go for 64-bit. If you're new to GNU/Linux then stick to either Ubuntu or Linux Mint. If you have prior knowledge of GNU/Linux then go for Fedora 14 or Opensuse 11.3. I chose to install Arch Linux (64-bit).

Also, the best media center software for this setup would undoubtedly be XBMC. This is a superb piece of software which can connect to internet and get all the metadata of your movies, TV shows & music.

Here's the screenshot of the movie section :-

And, this is the screenshot of the TV show's section :-

So , try and build this HTPC & please tell me about your experiences. Any suggestions and comments are welcome.

=-=-=-=-=
Powered by Blogilo

Saturday, 1 January 2011

Arch Linux Review

Of lately, I’ve grown tired of re-installing my beloved Fedora again and again after 6 months. Although, I loved each and every feature of Fedora, but reinstalling it again after 6 months was a pain. I know it can be upgraded directly to the new version, but this time I wanted something which I could upgrade even if I booted my GNU/Linux after 1 year. I wanted to get the Fedora’s cutting edge new packages in the next distro that I was going to install on my system. Ubuntu is awesome, but it has dated packages when compared to Fedora.

Initially, I was even thinking about getting FreeBSD on my system. But re-learning the whole OS from the scratch is cumbersome. Maybe some day I’ll install FreeBSD some day on my system. So, time to decide the new distro. I went over to my trusty Distrowatch site and found that Arch Linux was on #8. A quick search over few forums confirmed that Arch Linux also offers latest packages. So, time to install Arch Linux on my system. First, here’s the configuration :-


  • AMD Athlon II X4 640 @ 3.0 GHz


  • Biostar TA 790 GX BE


  • 4 GB DDR2 @ 800 MHz


  • 1 TB SATA II HDD


  • Onboard Realtek sound card


  • Palit GeForce GTX 260 Core 216 graphics card with 896 MB of GDDR3 memory


  • AOC F22 21.5” full HD LCD with 1080p resolution


The first thing that I had to make sure was that the sound card and the graphic card of my system work with Arch Linux. A quick search over the Arch wiki and the Arch forum confirmed that both of these devices work.Now, as I had 4 GB RAM, I had to switch to 64-bit version. 64-version also gives me faster performance in audio and video encoding. I went to the download section and downloaded the x86-64 version of the Core Image which is essential for offline installation. This is only 350 MB download which contains the Linux kernel and other GNU utilities.Warning :- If you’re new to GNU/Linux and have a fear of command line, please don’t attempt to install Arch Linux on your system.

Installation

The installation of Arch Linux requires pretty good control over the command line. For anyone who is willing to install Arch Linux on his/her system, I would recommend that one should take the print-outs of the Arch Linux Beginner’s guide.  Another computer or a laptop would also help. Trust me, YOU NEED TO TAKE THOSE PRINT OUTS. If you don’t, you’ll regret it later.

So, I transferred the ISO image to my USB pen drive using the following command :-

dd if=image.iso of=/dev/sd[x]


Replace image.iso with the image name and x with the drive letter of the USB drive.This step makes the USB drive bootable. You can also burn the ISO image to a CD and proceed with installation from there.Now, for the rest of the installation you should refer to the print outs that you’ve taken.

The Desktop

My desktop environment of choice is GNOME. I absolutely love it. Moreover, I also installed Compiz Fusion with Emerald themes to make it look more nice. Few recommended application for the GNOME user are :-


  • Listen – Audio Player. Better than Banshee, eats less resources and doesn't requires Mono.


  • Mplayer – Video Player. Awesome if you’ve installed NVIDIA’s proprietary drivers. It will accelerate the HD content with the VDPAU library. Just make sure you check it in the player’s option.


  • LibreOffice – Free Office Suite. Oracle sucks!!


  • Chromium – Webkit based browser used by Google.


  • Firefox – Awesome Open Source browser.


  • Opera – It rules!! Best damn browser.


  • Thunderbird – Awesome email client.


  • XBMC – For your media enter needs.


  • Deluge – BitTorrent Client. Better than Transmission because it supports queuing.


Final Verdict


Trust me, if you’ll install Arch Linux, you’ll learn a lot. You’ll learn almost everything about the operating systems. There are no unnecessary modules that are loaded on the boot time thus slowing down your system. Everything that your system requires can be configured in the /etc/rc.conf file. It used only 1.1 GB RAM with VirtualBox running Windows 7, Firefox, Chromium, GNOME, Compiz-Fusion, Listen, Pidgin & OpenOffice running.


Rating – 9.5/10

Tuesday, 13 July 2010

Opera 10.60 Review

Browser!! The most important piece of software on your computer. It is your window to the world of the Internet. There are many browsers in the world. For e.g. :-

  • Mozilla Firefox.

  • Internet Explorer.

  • Safari.

  • Google Chrome

  • Opera.


But, there is one which stands out among them. Its called Opera. It is currently, the fastest browser in the world.

Opera is the pioneer in the browser arena. It was the first browser to introduce tabbed browsing, the first one to implement mouse gestures, the first one to have a built-in torrent client & the only one which has a built in e-mail client. So, lets take a look at Opera.

Tab Management :-


Tabbed browsing was the feature that was first implemented by Opera. Now, Opera 10.60 takes it to a whole new level. Check out the screenshot.


Tabs are beautifully managed in Opera 10.60. Right click on the tab-bar & you can select the position of the tabs on any corner of your screen.

Speed Dial:-


Speed dial is another mind-blowing feature that was implemented by Opera. This feature allows you to assign up to 25 websites on the speed-dial screen. Speed-dial can also be assigned as the homepage but it automatically opens when you open a new tab or a blank window. Shortcuts for the first 9 speed dials are assigned as Ctrl+1 to Ctrl+9 so that you can easily access the tabs. Here’s the amazing screenshot of my desktop :-


Mail Client :-


Opera has a built-in email client too. It supports POP3 & IMAP mail. If you have your mail account on GMail, Yahoo! Mail, Hotmail or AOL then it automatically downloads the required settings for the mail. You only have to select weather you want POP3 or IMAP. If you’ve your mail on another mail provider you can also manually assign the settings.  Its very helpful to surf the web in one tab and check your mail in another. Check out the screenshot :-


Misc features :-


  • In built torrent client.

  • Download manager.

  • Awesome Javascript engine (Carakan).

  • Content Blocking.

  • Superb javascript handling.


Performance :-


What can I say, check out the marvellous Presto engine in its full glory :-


According to the above benchmark, it demolishes every browser in the market today.

Pros :- Superb tab management, awesome javascript engine, built-in email client.

Cons :- Very less plugins.

Rating :- 5/5.

Download link :- www.opera.com

Thursday, 20 May 2010

The Cousin (s) experiment

Early this year, my two cousins got new computers. One of them got a laptop & other one went for a desktop. One of my cousin, who got a laptop, is a second year computer science engineering student. The other one, has just completed his high-school.

The laptop was taken without my advice and unsurprisingly it sucked. But still, it makes a good general purpose laptop. The configuration of the Dell laptop is :-


ProcessorIntel Pentium Dual Core T4200
RAM2 GB DDR2 @ 667 MHz
HDD250 GB 5400 RPM
Screen Size14.1” 1280x720 resolution
GraphicsIntegrated Intel GMA
PriceRs. 35000

Considering the price this laptop is not bad, but still, it is not good either. It was shipped with FreeDOS. My cousin, who has no knowledge about any operating system came to me and asked me to install an operating system on it.

Lets come to my second cousin, who just cleared his high-school. His dad called me and asked me to build a nice PC under Rs.25k. I was initially going for AMD Athlon II X2 250 & AMD 785G chipset. But the demand was so much high of this platform that we were told to wait for 7 days. So, I decided to go with the following configuration which was available on the spot:-


ProcessorIntel Pentium Dual Core E5400 @ 2.7 GHz
Motherboard Asus G31
RAM 2 GB DDR2 @ 800 MHz Kingston
HDDWestern Digital Blue 500 GB SATA II
DVD WriterSony DRU 870 S
LCDAOC F19 18.5” 1366x768 resolution
Cabinet & PSUZebronics Bijli with the default PSU.
Graphics cardIntegrated

I decided to install Fedora 12 on both of the systems. There were many advantages of doing so, mainly :-

  • FOSS products.

  • No headaches about viruses, spywares, adwares etc.

  • Built in superb OpenOffice.Org suite.

  • Low resource usage.

  • No need of drivers (except for the Broadcom wireless in laptop).

  • Integrated IDE & development tools.

  • No need of defragmentation or disk cleanup.

  • Delta RPMs, which reduce the size of updates upto 80% (95% in some cases).


The installation was a breeze. I chose ext4 as the default filesystem on both computers. I created the following partitioning scheme on the both systems :-

  • / – was allocated about 25 GB on both machines.

  • /home – around 30 GB on the laptop & 40 GB on the desktop.

  • /movies – for storing movies. ext4 was again chosen.

  • /music – for storing music, again ext4.

  • /data – for storing miscellaneous data.


The only thing which I had to do was to grant permission to them to mount the filesystems and to install the updates. That’s it nothing else.

The installation went super smooth. Everything was detected out-of-the-box. I had to install few multimedia packages like gstreamer-plugins-bad  & ugly along with other multimedia features. They both were familiar with VLC Player though, so I installed that too. Oh, and I chose GNOME as the default user environment. The webcam was detected by Fedora & was working flawlessly via cheese. Brasero was doing a nice jobs in burning the data discs, music was perfectly being managed by Rhythmbox & Banshee.

Its been about 5 & a half months. I’ve never, ever done any kind of repair on those two computers. Every gadget in their home is working flawlessly with Fedora 12. More over, I even visited my cousin's college to instruct his teacher & his seniors on Fedora 12.

I just want to say that, if you have a cousin or a relative who is new to computers, then try installing any flavour of GNU/Linux or PC-BSD. You’ll be amazed how well people adopt it. There are people who still believe that you’ve to learn commands to work on a GNU/Linux computer. Both of my cousins can’t even copy files via command line, yet they are working on their systems since last 5 months without my supervision.

Wednesday, 12 May 2010

VirtualBox 3.0 review & Ubuntu installation

I'm a lot into virtualization. I tried different apps on different systems. At first I tried VMWare Workstation on my old computer which had a Pentium IV processor & 768 MB RAM. But to truly experience the power of VirtualBox, you will need a fairly powerful system. Here are my recommended specs :-

  • Intel Core 2 Duo E6400 or higher

  • AMD Athlon X2 5600+ or higher

  • 2 GB RAM (4 GB recommended)

  • 100 GB or more hard drive space

  • Direct X or OpenGL enabled graphics card or onboard chip.


Virtualbox supports hardware-enabled technologies such as Intel VT & AMD-V. To see wheather your processor supports virtualization or not you can download CPU-Z. Enclosed is the screenshot of CPU-Z of my system which clearly shows AMD-V being listed under the Instructions tab.


I'm using Windows 7 has the host OS as lot of guys want to install GNU/Linux but are afraid to do so. So I'll be instructing on how to install Ubuntu under Virtualbox.

To install Ubuntu under virtualbox, we need to go through the following steps :-

  • I assume that you already have the Ubuntu disc image or CD. If not then please download it from www.ubuntu.com relevant to your processor architecture still 32-bit is recommended.

  • Install Virtualbox on your OS. Windows & Mac OS X users can download and install it via visiting www.virtualbox.org. GNU/Linux users can get it via installing it from their package-manager. FreeBSD users can compile it via the ports manager.

  • Now either copy the disc-image of Ubuntu on the HDD (recommended) or just pop in the CD in the optical drive tray.


Rest of the tutorial is explained in the screenshots.

VirtualBox Homescreen.

VBox-home

Now as we click on the Next button, we’re presented with the OS selection screen.

Here, Select Linux from the dropdown menu & then select Ubuntu. If you’re using 64-bit release then select Ubuntu 64-bit.

Selection

Now we come to the hardware allocation part. Follow these simple steps :-

  • When asked about the RAM, allocate about 1/3rd RAM of your system. 512 MB should be enough if you don’t intend to multitask.

  • Allocate about 10 GB of space. Generally, the HDD image is stored in your C:\ drive or the partition where the OS is installed. But you can & you should move the location to elsewhere on your disk partition.


HDD

Now we need to add a disc image to the installation. See the screenshot for more details.

Disc

The feature can be opened via clicking on the CD-DVD device’s section.

The, those using CD image can add their image by clicking on the Add button. Those using physical drive can just add their device via the CD-DVD device.

After this, you can start the installation of Ubuntu.

Installation of Ubuntu :-

Installation of Ubuntu is a piece of cake. You just need to follow these steps :-

  1. Select Install Ubuntu.

  2. Then, select your time-zone.

  3. Select your keyboard.


Partitioning is not a big matter of concern if you’re installing GNU/Linux in a virtualized environment. However, you might need to get familier with it as you’ll need some knowledge while installing GNU/Linux natively.

The partition scheme of GNU/Linux contains mainly three things :-

  • ‘/’ – This is the root partition. Here your OS is installed. The default file-system in modern distros is ext4.

  • /home – This is the home folder. Here you can store your music, movies, documents etc.

  • swap – This is called swap space of virtual-memory.


If you’re installing it natively, then I suggest that you should give about 10 GB to / & then rest to your /home partition. Swap should be around 1.5 times the size of RAM upto 2 GB. If you have more than 2 GB RAM , then just allocate the size of your RAM to swap space.

Returning back, here is the screenshot of partition screen. I just selected Erase & use entire disk. Then, you just need to answer some questions more like your name, password & computer name. Then finally click on install and sit back & enjoy.

After the installation, reboot the VM & you’ll be presented with the Ubuntu desktop. Now, we just need to install one more thing called “Guest Additions”. This will greatly boost the performance of Ubuntu.

Guest Additions

Select the Install Guest Additions as shown in the picture. Then, navigate to your home folder and navigate one last command.

Modules

To install this module, just copy :-

  • VBoxLinuxAdditions-x86.run if you’re running a 32-bit version to your home folder.

  • VBoxLinuxAdditions-amd64.run if you’re running a 64-bit version your home folder.


Then, Open Terminal from Applications > Accessories > Terminal. Then execture the following command :-
sudo sh VBox (and then press tab, it will auto-complete)

Then just reboot. After rebooting, you will see that you can easily navigate between the host & guest OS. If you need seelmless integration with the host OS, then press ‘Right Ctrl & L’ your desktop will then transform.

Overall, VirtualBox is highly recommended. You will see that it doesn’t even eats the RAM that is allocated to the Guest OS unless you’re heavily multitasking on it.

Verdict :- Highly Recommended!!!

Monday, 10 May 2010

Enabling AVIVO Video converter’s full functionality in Windows 7

I was a long time NVIDIA user. This summer, a month back I switched loyalty to AMD and got their once flagship, ATI Radeon 4870 1 GB for as little as Rs. 9500. Initially I wanted to go for Zotac GTX 260. But it was priced high, about 1.5k more than the ATI counterpart.

The performance of the card is awesome in games. But I use the card in other fields too such as converting videos etc. Earlier, I use to encode videos using Badaboom converter which is designed on CUDA for NVIDIA. It is a mind blowing product and is worth the $20 price. Every one who owns a NVIDIA graphics card should spare some money for it too.

Then, I started converting videos with the help of ATI’s built-in AVIVO video converter. It used to give me a lot of headaches as it was unable to decode the AVI, MP4 & MKV files. It used to give me ‘Unsupported File Format’ error. Then I found a solution. Just follow these steps :-

  1. Install Shark007 codecs from http://shark007.net/ relevant to your architecture.

  2. Then, download Codec Tweaker from http://www.codecguide.com/windows7_preferred_filter_tweaker.htm.

  3. After that, start Codec Tweaker & un-select everything that is played via Microsoft. Select FFDSHOW instead.

  4. Disable Media-Foundation, it is the primary culprit.

  5. Start AVIVIO video converter via Advanced Mode's drop down menu.

  6. Make sure you select Enable Acceleration.

  7. Enjoy.


If you want more control over the ATI card then I suggest that you download A’s video converter from here.

Update :- As of March 1st 2011, A's Video converter is no longer available.

Regarding performance, just see the table below.


Source File & SizeConversion TimeFinal Size
175 MB TV Show1:20 min70 MB
700 MB Movie5:26 min423 MB

Click on it to get full size.

Check it out. Its worth the shot.